Sewing on Dissolvable Fabric
Have you ever experimented with dissolvable fabric?
Dissolvable or soluble fabric is something of a godsend when it comes to textile art. There are different types of soluble fabric and yet so many things you can create with it. I have been using this material in my free motion embroidery for quite a while especially when it comes to creating textile sculptures - you can mold it into any shape you want so long as you have the mold ready. So far, the manufacturers and scientists claim that they are safe to use , and while that’s good, I am still on the look out for better alternatives because nothing really ever disappears when it’s disposed of. I’ll let you know if I find it (if it exists).
If you read my previous post on dissolvable fabric, you’ll know:
What is Dissolvable Fabric?
Is Dissolvable Fabric Eco-Friendly and Safe?
What Can Dissolvable Fabric Be Used For ?
How Do You Store Dissolvable Fabrics ?
I like to use this material to create mesh and lace-like structures, and I follow these simple rules when I want to start projects that involve dissolvable fabric.
Stay Away from Water
Water and dissolvable fabric don’t go well together, and you don’t want a gunky mess to happen during the sewing. Sometimes the water can just be the sweat from your palms - this happened to me recently and I just had to discard the sewing I was doing and restart! I have tried rubbing baby powder on my fingers and even wore gloves before handling the dissolvable fabric.
If you live in a humid place, have a dehumidifier running when you’re sewing.
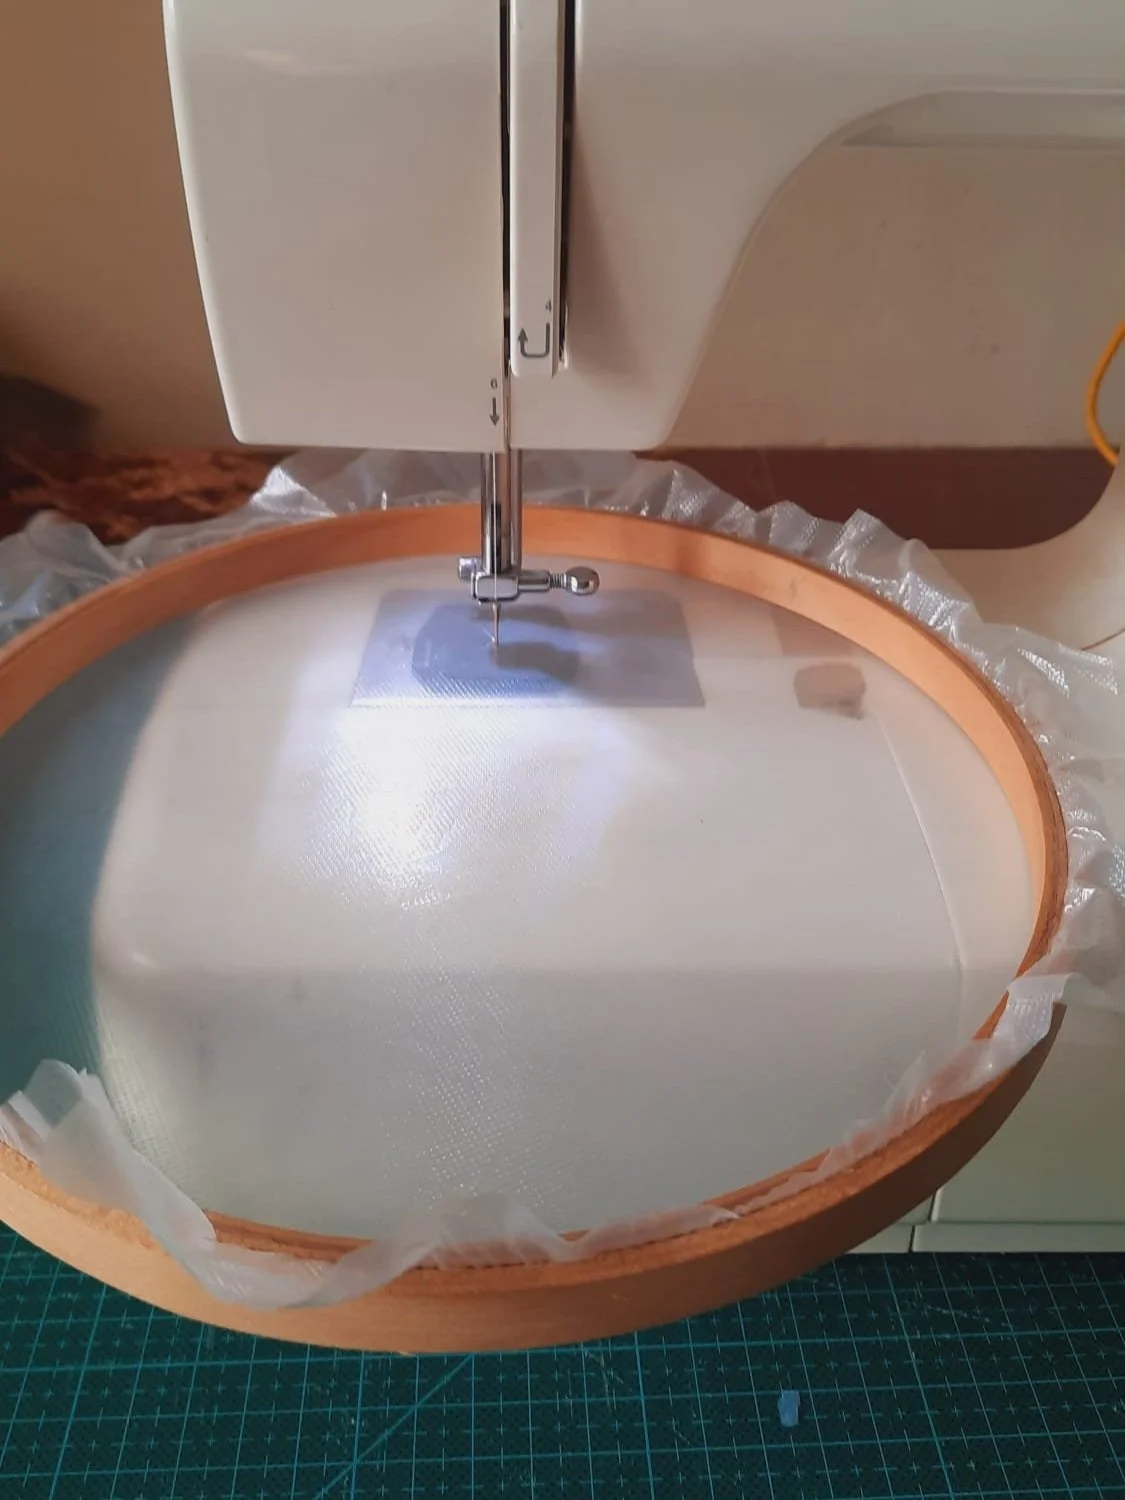
2. Use an Embroidery Hoop
I always start by making sure I have a good quality embroidery hoop that can secure the material. I personally prefer hoops that have a good grip - you can test this out by tapping your fingers on the fabric once it’s secured; it will be like playing on the drums and you will hear a clear thump sound. Another good way of ensuring it’s tight is to place the hoop at eye level, and if you spot some sagging then you know it’s not tight enough - the sagging will look like tiny valleys.
3. Use the Right Needle
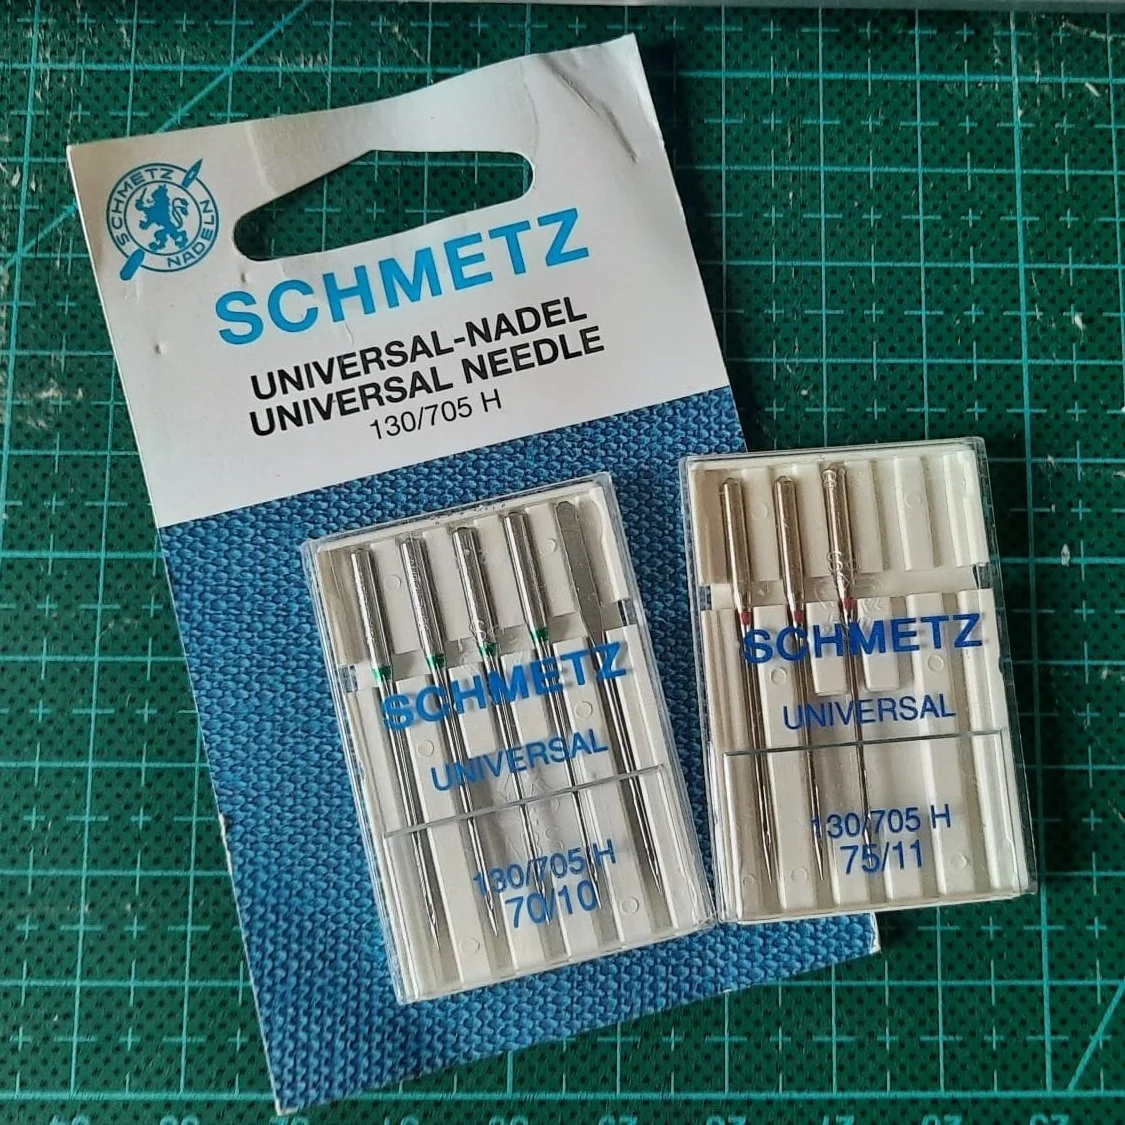
As the dissolvable fabric is thin, I prefer to use very sharp and fine sewing machine needles (70/10 or 75/11). Sometimes, I may not have these in my stash, and so I would layer up the dissolvable fabric to reinforce it. If I am sewing a mesh like pattern that requires a lot of stiches, I would prefer not to have the fabric break up due to the needle. If in doubt, test a small sample before working on the bigger project.
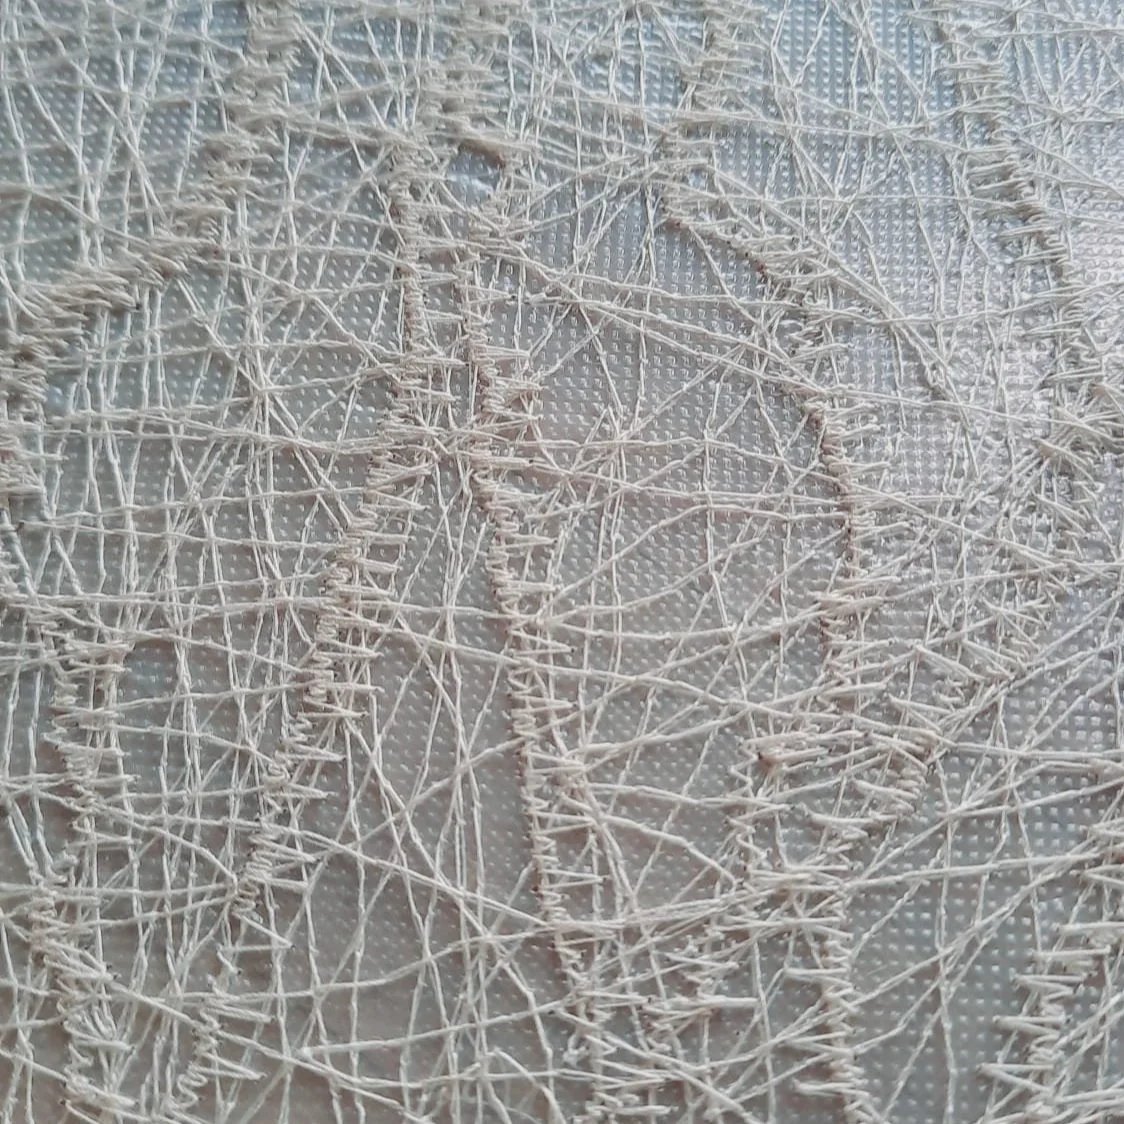
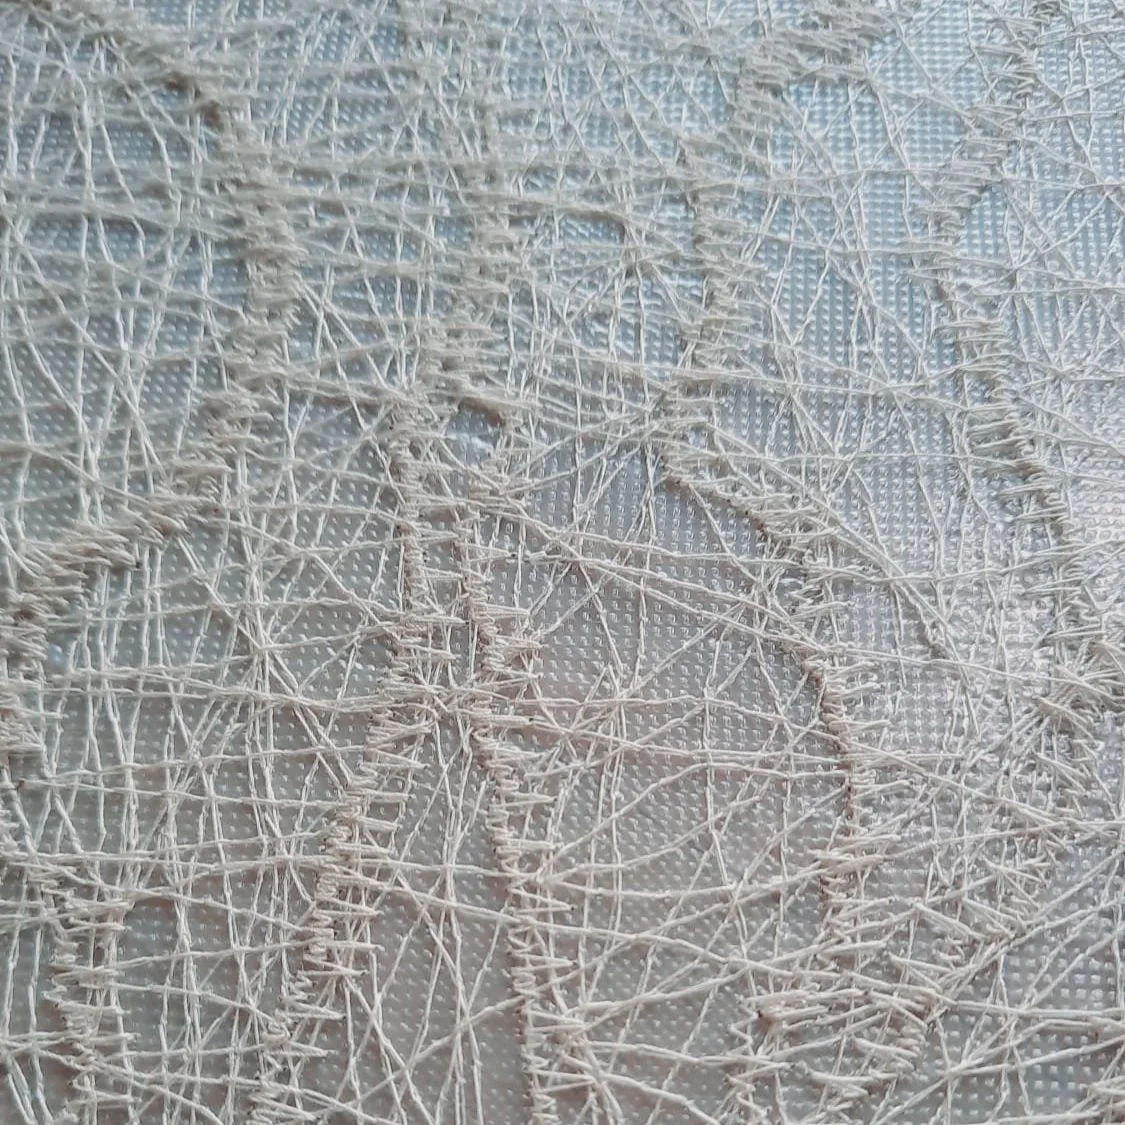
4. Create a Mesh
I like to think of myself as a spider when sewing on dissolvable fabric. We have to remember that the design needs to be able to retain its shape once it’s dissolved in water. Each intersection that you sew contributes to the scaffold of threads; the more intersections, the stronger it will be. If your mesh is dense the created piece will have a thicker texture compared to something that has fewer stitches. In my experimenting, I’ve realised there’s no need to stick to straight stitches - I tried out a variety of the additional stitches on my sewing machine whilst on the free motion embroidery setup. I quite like the look of this - it reminds me of tree roots.
5. Work Fast
Once dissolving the piece in water, I need to work quickly to shape the item. This means I have the mold (it can be a plate or anything you want your piece to be molded into) ready. So if I want to make a fabric bowl from dissolvable fabric, then I will use a bowl as the mold.
At the end of the day, working with dissolvables takes practice. If your first try doesn’t turn out the way you want it, then try again. My advice is to start on small projects and work your way up as you get more practice. Dissolvable fabric can get expensive so it’s best to try out with small pieces first.